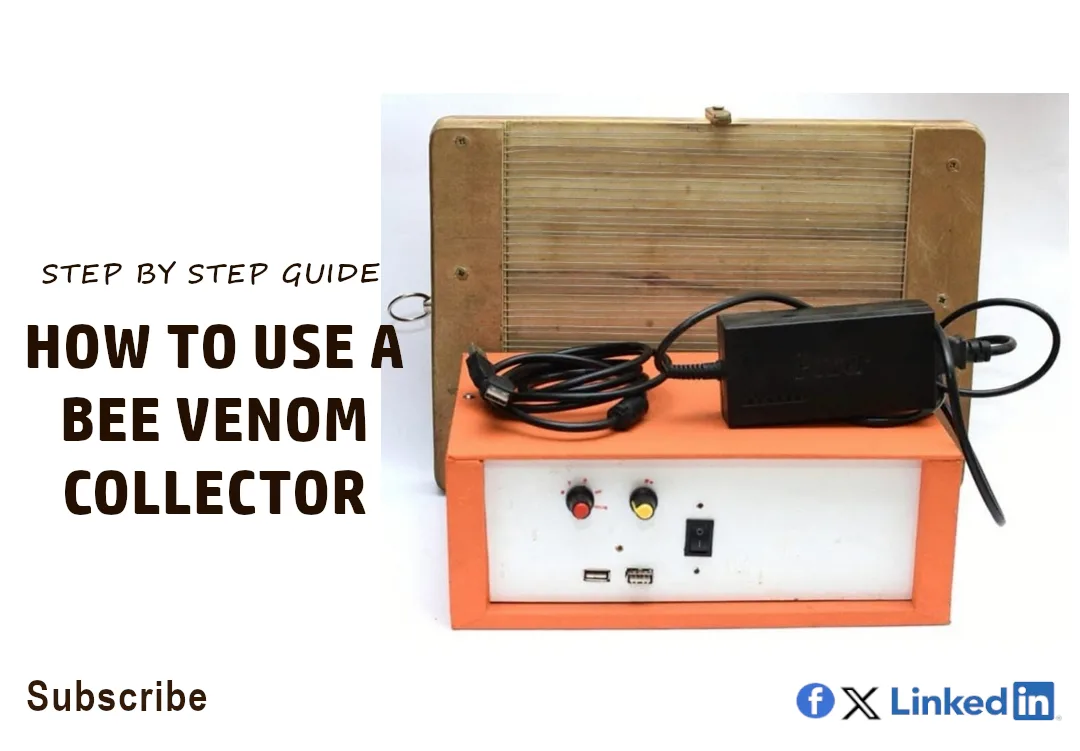

A bee venom collector looks simple from the outside: a small box, two knobs, a switch and a wire screen. But every part has a job, and knowing what each one does is the difference between a smooth collection round and a frustrating morning in the apiary.
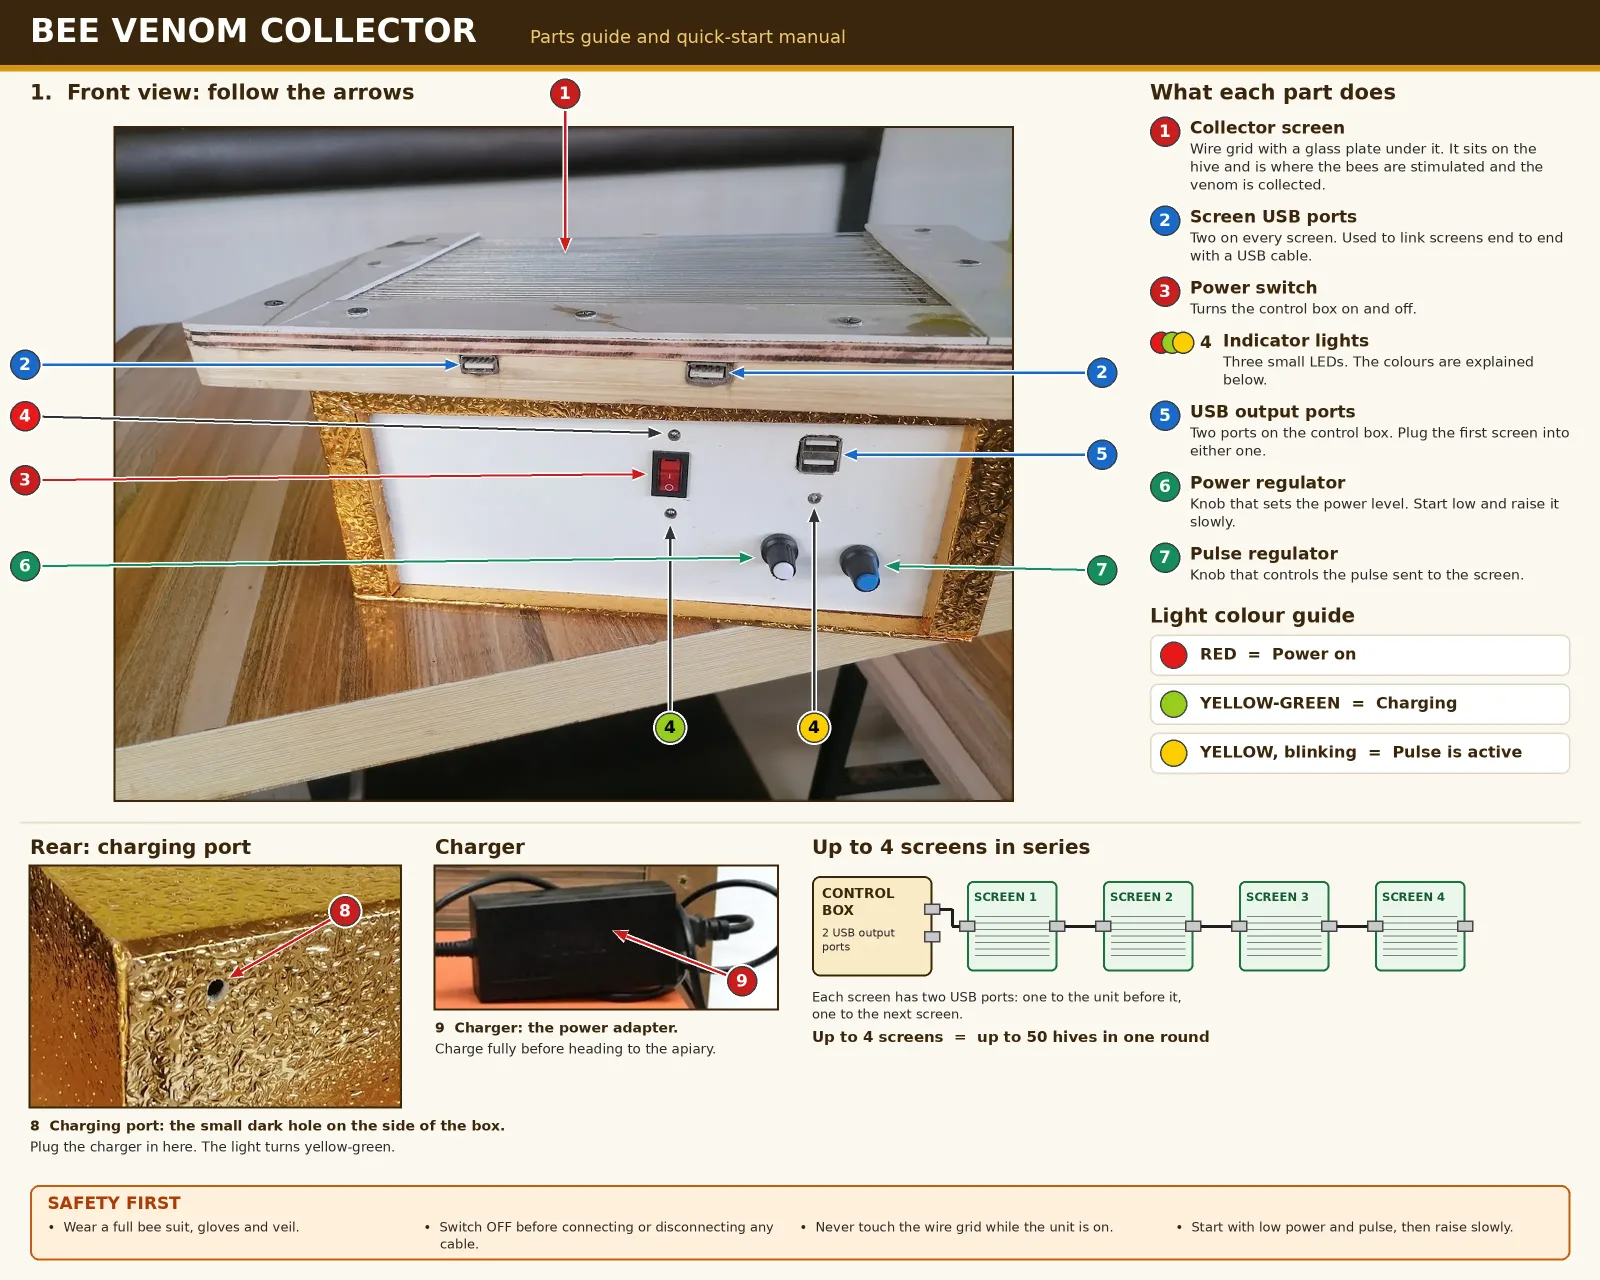
This guide walks you through the device part by part, then shows you how to charge it, connect it and run it. Keep the parts guide image open while you read, because the numbers in the text match the numbers on the picture.
Meet the Parts
1. The collector screen. This is the wire grid with a glass plate beneath it. It goes on the hive, and it is where the collection happens. When the device sends its pulses to the wires, the bees respond by stinging the glass, and the venom is left on the plate.
2. Screen USB ports. Every screen has two USB ports. They are how you link screens together, end to end, with a USB cable.
3. The power switch. The red rocker switch turns the control box on and off.
4. The indicator lights. Three small LEDs tell you what the device is doing. We cover them in detail below.
5. The USB output ports. The control box has two USB ports. You can plug your first screen into either one.
6. The power regulator. This knob sets the power level of the device.
7. The pulse regulator. This knob controls the pulse that is sent out to the screen.
8. The charging port. A small, dark hole on the side of the box. This is where the charger plugs in.
9. The charger. The power adapter that keeps the device ready to work.
What the Lights Are Telling You
Learn the three colours, and you will always know what is happening:
Red: power is on.
Yellow-green: the unit is charging.
Yellow, blinking: the pulse is active. Each blink is a pulse going out to the screen.
If you switch on and see no red light, stop and check the charge before doing anything else.
One Device, Up to Four Screens
The device is built to grow with your apiary. You can connect up to four screens end to end, in a chain:
Control box, then Screen 1, then Screen 2, then Screen 3, then Screen 4
Because every screen has two USB ports, you use one to connect to the unit before it and the other to connect to the next screen. A USB cable runs between them. With all four screens in place, one device can collect from up to 50 hives in one round. That is why it suits the serious beekeeper working at scale.
How to Use the Collector, Step by Step
Before you leave for the apiary
Charge the unit fully. Plug the charger into the charging port (8) and wait for the charging light to show yellow-green. A full charge before the trip saves you from running out in the field.
Check your equipment. Make sure the screens are clean, the glass plates are in place, and the USB cables are in good condition.
Pack your protective gear. You will need a full bee suit, gloves and a veil, plus a smoker.
At the apiary
Suit up first. Put on your protective gear before you go near the hives.
Set up the control box on a flat, dry, stable surface close to your hives, away from damp ground.
Switch the power off. Before you plug anything in, make sure the red switch is in the off position.
Connect your screens. Plug a USB cable from either output port (5) into the first screen. Link any extra screens end to end, up to four in total.
Place the screens on the hives, as shown during your training.
Switch on. The red light shows that power is on.
Start low. Turn both the power regulator (6) and the pulse regulator (7) down to a low setting, then increase them slowly. The yellow light will blink as pulses go out to the screens.
Run the session for the time you were trained to use, and watch the bees from a safe distance. If a colony seems very stressed, lower the settings or stop.
Switch off and wait before touching anything. Turn the red switch off, then disconnect the screens.
After the collection
Collect the venom carefully. Once the bees have settled, the dried venom is taken from the glass plates and stored clean, dry and sealed. Follow the handling steps from your training, and keep your equipment free of dust and contamination.
Clean the screens and check for damage.
Recharge the unit so it is ready for the next round.
Done properly, the bees sting a smooth glass plate rather than skin, so they do not lose their stingers, and the colony can carry on as normal. Always give your hives time to recover between sessions.
Safety Rules You Should Never Skip
Always wear full protective gear. A bee suit, gloves and veil are not optional.
Switch off before connecting or disconnecting any cable.
Never touch the wire grid while the device is on.
Start with low settings and raise them gradually.
Keep the control box and cables dry, and keep the equipment away from children.
Never work alone if you can avoid it, and anyone with a history of serious reactions to stings should not take part.
Keep an emergency plan, including the location of the nearest clinic.
Quick Troubleshooting
Problem | What to check |
|---|---|
No red light when switched on | Charge the unit and check the power switch |
Charging light does not come on | Check that the charger is fully plugged into the charging port |
No blinking yellow light | Check that the screens are properly connected and the pulse regulator is turned up slightly |
One screen is not responding | Check the USB cable between that screen and the one before it |
Looking After Your Device
Charge it fully after every round.
Wipe the screens clean and keep the glass plates free of scratches.
Store the control box, cables and charger in a dry, dust-free place.
Handle USB cables gently, because bent or damaged cables are one of the most common causes of faults.
From Collection to Income
A well-managed hive can give about one gram of venom a month. A collector that handles up to 50 hives in one round makes it practical to run a commercial venom apiary, and it is what turns a collection of hives into a real business. If you are still planning your venom farm, read our beginner's business plan for the numbers.
Ready to Take the Next Step?
If you want training on using a bee venom collector, advice on collection equipment, or a market for your venom, we would be glad to help. Get in touch here: https://horizonbeeafrica.com/contact
Always follow the training and instructions provided with your own device. Settings and procedures can vary.

Comments
0 comments